How to Clean Hearing Aids (and Avoid Costly Repairs)

Hearing aids are a major investment — and just like glasses or dentures, they need regular care. Without proper cleaning, earwax, dust, and moisture can clog your device, muffle sound, or even cause permanent damage. In this guide, we’ll walk you through the best ways to clean your hearing aids safely at home.
1. Why Cleaning Matters
- Hearing aids cost £1,000s — repairs often £200–400.
- Earwax is the #1 cause of breakdowns.
- Daily cleaning = clearer sound + longer device life.
2. Daily Cleaning Routine
- Use a soft brush to remove wax around microphone and receiver.
- Wipe casing with a dry cloth (never water).
- Open battery door at night to allow airflow.
Pro Tip: Avoid cotton swabs — they push wax deeper into the device.
3. Weekly Deeper Care
- Replace wax guards every 2–4 weeks (depending on buildup).
- Use a drying box/dehumidifier overnight to protect from moisture.
- Check tubing and earmolds for cracks or blockages.
4. What NOT to Do
- Don’t use alcohol wipes (they dry and damage plastic).
- Don’t submerge in water or use household cleaners.
- Don’t ignore muffled sound — often a sign of wax blockage.
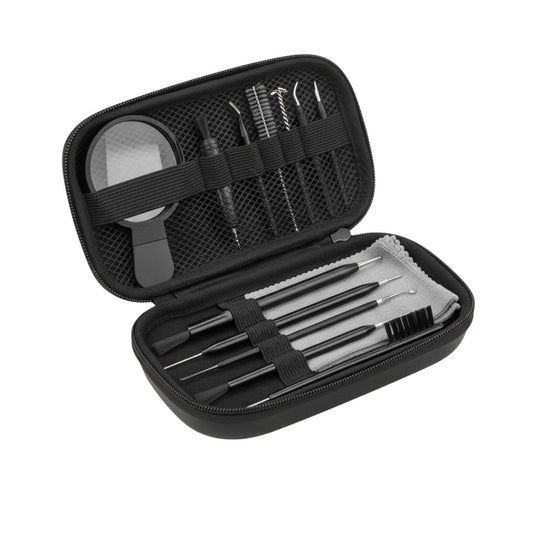
5. The Smarter Way: Complete Care Kits
Cleaning doesn’t have to be complicated. That’s why we designed the Laväge Hearing Aid Protection Kits — including everything you need to clean, dry, and protect your hearing aids at home. Backed by a 30-day guarantee and shipped from the UK.
Conclusion
Regular cleaning keeps your hearing aids working at their best and saves you from unnecessary repairs. By following a simple routine and using the right tools, you’ll extend the life of your devices — and enjoy clear, comfortable sound every day.